
The Kubently CLI provides a modern, interactive command-line interface for managing Kubently clusters and debugging Kubernetes issues using natural language queries.
Features
- Beautiful Terminal UI: Colored output, ASCII art banners, and formatted tables
- Interactive Debug Sessions: Real-time chat interface with the Kubently agent
- Cluster Management: Add, list, status check, and remove clusters
- Natural Language Queries: Ask questions in plain English about your Kubernetes clusters
- Session Management: TTL-based sessions with unique IDs and command history
Requirements
- Node.js 18.0.0 or higher
- npm or yarn
- Access to a Kubently API server (see Installation Guide)
Installation
Install from npm (Recommended)
npm i -g @kubently/cli
Or use npx without installing globally:
npx @kubently/cli
Install from Source
For development or the latest unreleased features:
# Clone the kubently repository
git clone https://github.com/kubently/kubently.git
cd kubently/kubently-cli/nodejs

# Install dependencies
npm install

# Build the TypeScript code
npm run build

# Create global CLI command
npm link
Quick Start
1. Initialize Configuration
First, configure the CLI with your Kubently API details:
kubently init
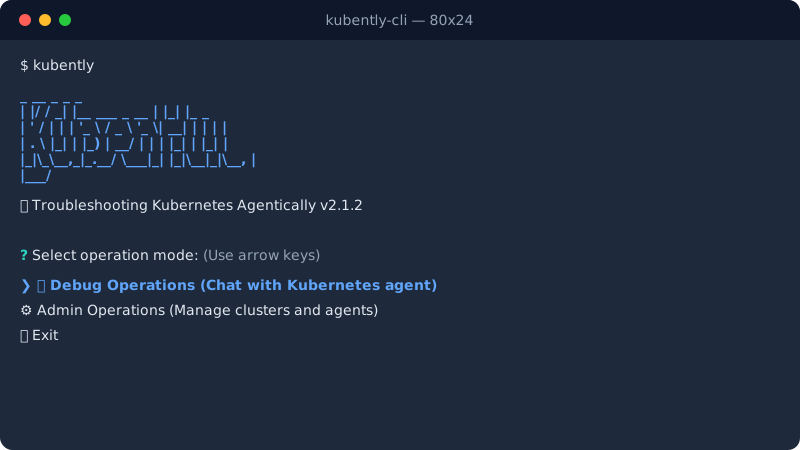
This will prompt you for:
- Kubently API URL: The endpoint for your Kubently API (e.g.,
http://localhost:8080) - Admin API Key: Your API key for authentication
Configuration is stored in ~/.kubently/config.json with restrictive permissions (600).
2. Start a Debug Session
Start an interactive debugging session with natural language support:
# Debug a specific cluster
kubently debug my-cluster

# Start without specifying a cluster (you can specify it in your queries)
kubently debug
Commands
Installation Command
kubently install
Install Kubently into the current kubectl context and drop into a debug chat — namespace, secrets, Helm install (published chart), executor registration, and CLI configuration in one command.
kubently install
Options:
--provider <p>— LLM provider:anthropic-claude(default),openai,google-gemini--llm-api-key <key>— LLM key (default: provider env var, else prompt)--cluster-id <id>— logical cluster id (default: derived from kube context)--namespace <ns>— install namespace (default:kubently)--chart <path>— install from a local chart directory--yes/--no-chat— non-interactive use
Reruns are idempotent — existing secrets are reused.
MCP Bridge Command
kubently mcp
Run a local stdio↔HTTP MCP bridge to the deployed /mcp/ endpoint, so any
stdio MCP client can use Kubently without knowing the endpoint or key:
# Add to Claude Code
claude mcp add kubently -- kubently mcp

# Point at a different deployment
kubently mcp --api-url https://kubently.example.com --api-key <key>
Configuration Commands
kubently init
Initialize or update CLI configuration.
kubently init
Interactive prompts:
- Kubently API URL
- Admin API key
Cluster Management Commands
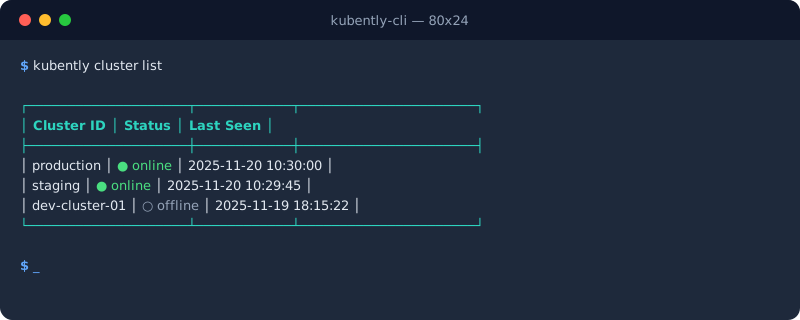
kubently cluster list
List all registered clusters.
kubently cluster list
kubently cluster status <cluster-id>
Check the status of a specific cluster.
kubently cluster status production
kubently cluster add <cluster-id>
Add a new cluster to Kubently.
kubently cluster add production
This generates an executor token and provides deployment instructions.
kubently cluster remove <cluster-id>
Remove a cluster from Kubently.
kubently cluster remove staging
Debug Commands
kubently debug [cluster-id]
Start an interactive A2A debugging session.
# Debug specific cluster
kubently debug production

# Start without cluster specification
kubently debug
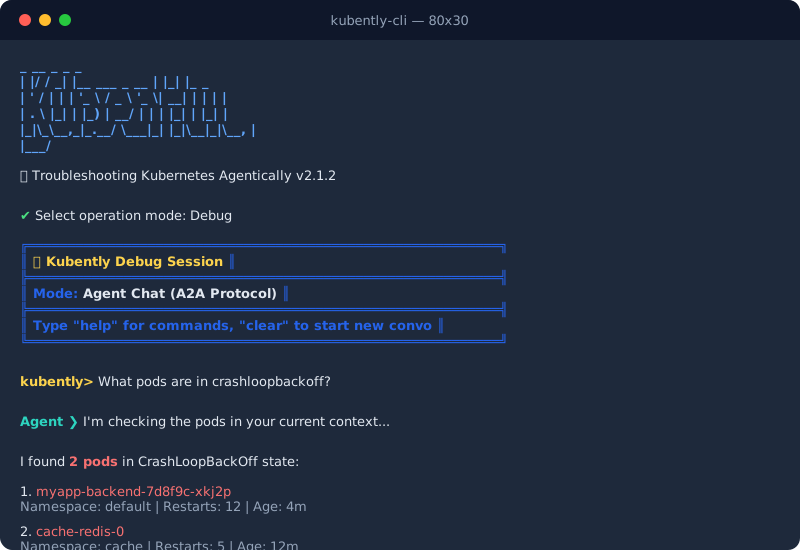
Interactive commands within debug session:
help- Show available commandsclear- Clear the screenhistory- Show command historyexitorquit- Exit the session- Natural language queries - Ask questions about your cluster
Example session:
Configuration
Configuration File
The CLI stores configuration in ~/.kubently/config.json:
{
  "apiUrl": "http://localhost:8080",
  "apiKey": "your-api-key-here"
}
Environment Variables
Environment variables take precedence over the config file:
export KUBENTLY_API_URL=http://your-api-url
export KUBENTLY_API_KEY=your-api-key
This is useful for:
- CI/CD pipelines
- Switching between multiple Kubently instances
- Temporary overrides without modifying the config file
Advanced Usage
Using Multiple Clusters
You can manage multiple clusters with Kubently:
# Add clusters
kubently cluster add production
kubently cluster add staging
kubently cluster add development

# List all clusters
kubently cluster list

# Debug specific clusters
kubently debug production
Scripting with the CLI
While the CLI is designed for interactive use, you can also use it in scripts:
#!/bin/bash

# Set environment variables
export KUBENTLY_API_URL=http://kubently.example.com
export KUBENTLY_API_KEY=your-api-key

# Check cluster status
kubently cluster status production

# Note: For non-interactive debugging, use the A2A API directly
# See the API Reference for programmatic access
Troubleshooting
Connection Issues
Problem: CLI cannot connect to the Kubently API
Solutions:
- Verify the API URL is correct:
curl http://your-kubently-api:8080/health - Check your API key is valid
- Ensure the Kubently API service is running:
kubectl get pods -n kubently - If using port-forwarding, verify it’s still active:
kubectl port-forward -n kubently svc/kubently-api 8080:8080
Authentication Errors
Problem: Receiving 401 Unauthorized errors
Solutions:
- Verify your API key in the config:
cat ~/.kubently/config.json - Re-initialize the CLI:
kubently init - Check the API key is correctly configured on the server
Debug Session Not Responding
Problem: Debug session hangs or doesn’t respond
Solutions:
- Check the Kubently API logs:
kubectl logs -l app=kubently-api -n kubently - Verify the LLM provider is configured correctly
- Check for network connectivity issues
- Try restarting the debug session
Command Not Found
Problem: kubently: command not found
Solutions:
- If installed from source, ensure you ran
npm link:cd kubently-cli/nodejs npm link - Check your PATH includes npm global bin:
echo $PATH npm config get prefix - Try using npx instead:
npx kubently debug
Development
Running from Source
# Clone the repository
git clone https://github.com/kubently/kubently.git
cd kubently/kubently-cli/nodejs

# Install dependencies
npm install

# Run in development mode
npm run dev

# Build TypeScript
npm run build

# Run tests
npm test

# Lint code
npm run lint
Project Structure
kubently-cli/nodejs/
├── src/
│   ├── index.ts           # Main entry point
│   ├── commands/          # Command implementations
│   │   ├── init.ts        # Configuration setup
│   │   ├── cluster.ts     # Cluster management
│   │   └── debug.ts       # A2A debug session
│   └── lib/               # Core libraries
│       ├── config.ts      # Configuration management
│       ├── adminClient.ts # Admin API client
│       ├── a2aClient.ts   # A2A protocol client
│       └── templates.ts   # Manifest generators
├── dist/                  # Compiled JavaScript
├── package.json           # Dependencies and scripts
└── tsconfig.json          # TypeScript configuration
Next Steps
- API Reference - Learn about the Kubently API
- Multi-Agent Guide - Integrate with multi-agent systems
- Security Guide - Security best practices
- Troubleshooting - Common issues and solutions